Hi Dev,
Are you looking for an efficient way to insert multiple records at once in Django? The bulk_create() function in Django minimizes database calls and significantly improves performance when handling large datasets.
Instead of creating records one by one, bulk_create() batch-inserts multiple model instances in a single database transaction, making it faster than traditional methods.
This guide provides a step-by-step implementation of bulk_create() and explores its benefits compared to standard database insertion techniques.
Step 1: Create a ProjectIn this step, we’ll create a new django project using the django-admin. Head back to your command-line interface and run the following command:
django-admin startproject exampleStep 2: Create a App
Now we'll create a single app called core to store a list of post names and store bulk of data in database. We're keeping things intentionally basic. Stop the local server with Control+c and use the startapp command to create this new app.
python3 manage.py startapp coreStep 3: Update setting.py
In this step we require to do add installed apps in our settings.py file. Add the below lines to your settings.py file:
Next, you need to add it in the settings.py file as follows:
settings.py
....
INSTALLED_APPS = [

    …..

    'core'

]
Step 4: Create a Model
In this step now go for the models we will We'll call our single model Post and it will have just two fields: title and description. And finally set __str__ to display the name of the post.
core/models.py
from django.db import models

class Post(models.Model):
    title = models.CharField(max_length=250)
    description = models.TextField()

    def __str__(self):
        return self.title
Ok, all set. We can engender a migrations file for this change, then integrate it to our database via migrate.
python manage.py makemigrations
python manage.py migrate
Step 5: Update admin.py File
In this step the Post class of the models is registered using the register() method to display the books tables in the Django administration dashboard.
core/admin.pyImport admin module from django.contrib import admin # Import Post model from .models import Post # Register Post model admin.site.register(Post)Step 6: Creating the Views
In this step, we need to create the views for performing fetch record to the database.Open the core/views.py file and add:
core/views.py
from django.shortcuts import render
from django.views.generic import ListView
from .models import Post
# Create your views here.
class BulkCreate(ListView):
# Define model
model = Post
# Define template
template_name = 'PostList.html'
# Read all existing records of posts table
queryset = Post.objects.all()
# Check the posts table is empty or not
if queryset.exists() == False:
# Insert 3 records in the posts table at a time
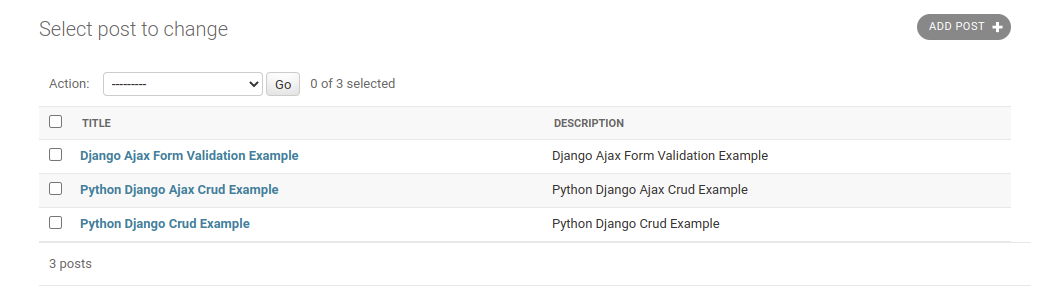
Post.objects.bulk_create([
Post(title='Python Django Crud Example', description='Python Django Crud Example'),
Post(title='Python Django Ajax Crud Example', description='Python Django Ajax Crud Example'),
Post(title='Django Ajax Form Validation Example', description='Django Ajax Form Validation Example'),
])
# Return all records of the posts table
def get_queryset(self):
# Set the default query set
return Post.objects.all()
Step 7: Creating the Templates
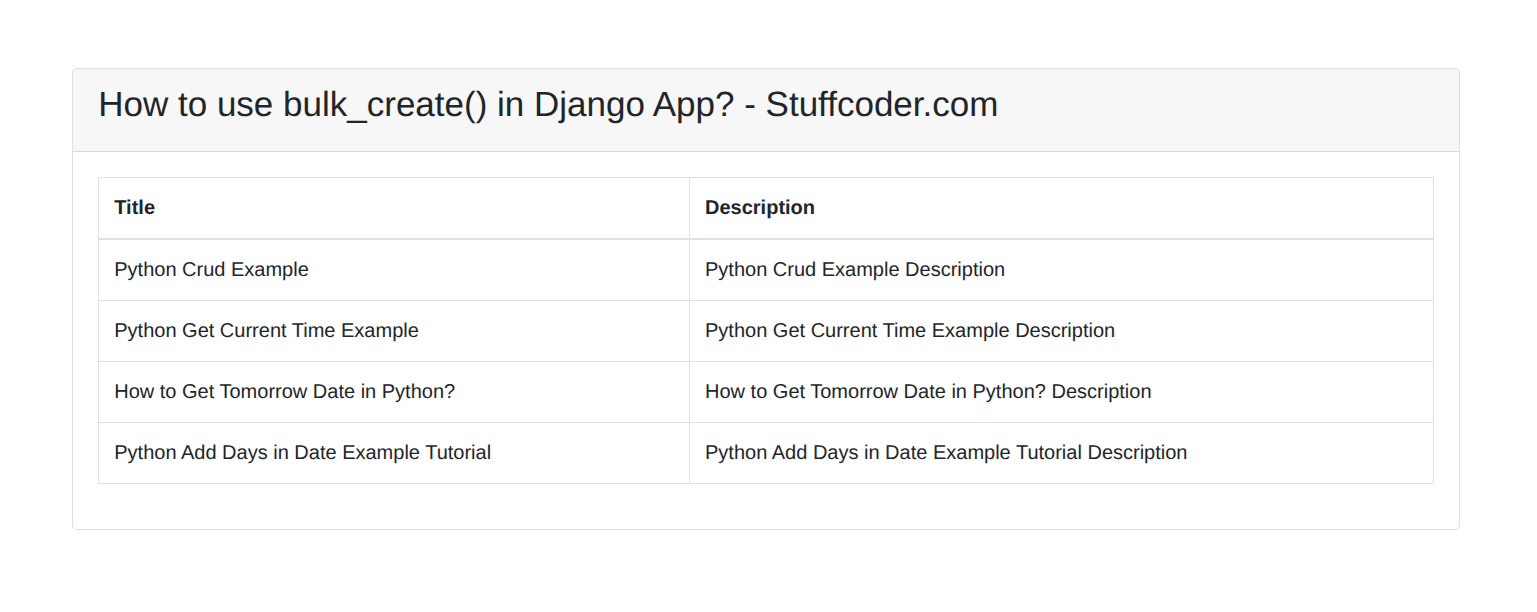
Next, then with your text editor create new templates files: core/templates/PostList.html file and the add:
core/templates/PostList.html
<!DOCTYPE html>
<html lang="en">
<head>
    <meta charset="UTF-8">
    <title>Stuffcoder.com</title>
    <link rel="stylesheet" href="https://cdn.jsdelivr.net/npm/bootstrap@4.6.1/dist/css/bootstrap.min.css">
</head>
<body>
    <div class="container mt-5 pt-5">
        <div class="row d-flex justify-content-center">
            <div class="col-md-12">
                <div class="card">
                    <div class="card-header">
                        <h3>How to use bulk_create() in Django App? - <span class="text-primary"></span>Stuffcoder.com</h3>
                    </div>
                    <div class="card-body">
                        <table class="table table-bordered">
                            <thead>
                                <tr>
                                    <th>Title</th>
                                    <th>Description</th>
                                </tr>
                            </thead>
                            <tbody>
                                {% for post in object_list %}
                                    <tr>
                                        <td>{{ post.title }}</td>
                                        <td>{{ post.description }}</td>
                                    </tr>
                                {% endfor %}
                            </tbody>
                        </table>
                    </div>
                </div>
            </div>
        </div>
    </div>
</body>
</html>
Step 8: Creating URLs
In this section, we’ll create the urls to access our CRUD views.Go to the urls.py core/urls.py file and update it as follows:
core/urls.py
from django.urls import path
from core import views

urlpatterns = [
    path('post/', views.BulkCreate.as_view()),
]
Next, we will require the modify the urls.py your root preoject folder lets update the file.
example/urls.py
from django.contrib import admin
from django.urls import path, include

urlpatterns = [
    path('admin/', admin.site.urls),
    path('', include('core.urls')),
]
Run the Server
In this step, we’ll run the local development server for playing with our app without deploying it to the web.
python manage.py runserverDjango Admin Interface
Next, go to the http://localhost:8000/post/ address with a web browser.
I Hope It will help you....
❓ Frequently Asked Questions (FAQ)Q1: What is bulk_create() in Django?
✔ bulk_create() is a Django ORM method used to insert multiple records at once with a single database call.
Q2: How does bulk_create() improve performance?
✔ It minimizes database queries by saving all model instances in one transaction, reducing overhead.
Q3: Can I use bulk_create() with relationships?
✔ Yes, but it doesn’t auto-create related objects; foreign keys must be set manually before saving.
Q4: Does bulk_create() trigger model signals?
✔ No, bulk_create() bypasses signals like save(), pre_save, and post_save. If signals are needed, records should be inserted individually.
Q5: How do I use bulk_create() for large datasets?
✔ Use bulk_create() with batch sizes to split large data inserts into smaller transactions.